iCreateOFX FAQ
Bite-size help videos
-
Updating Scripts
-
Adding Scripts
If you are experiencing scaling issues, i.e the application does not display as depicted in the images on this site, you can resolve this by following the process below.
- Firstly, close the application then:
-
Find the short-cut used to start the application and right click on it then click on Properties in the resulting pop-up menu. You'll then be presented with a dialog (left in
picture below).
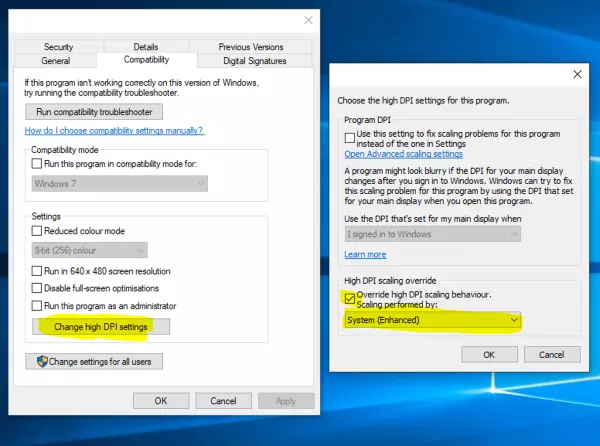
- Select the Compatibility tab at the top then click on the Change High DPI settings button (as highlighted). This will in turn open another dialog (right in the image above).
- Ensure you select the checkmark for Override high DPI scaling behaviour then select System (Enhanced) from the drop down box below it.
- Finally click OK on both dialogs then restart the application.
Where the Auto Notify feature is enabled AND the check-box selected, the resultant OFX or QIF file is automatically sent to the PFM associated with that file extension on your system. Once the PFM confirms receipt of the file, the application will delete the file from disk. To get the file, do the following:
- Firstly ensure the Auto Notify feature, if enabled, is not selected, then:
- Double-click on the file in the grid to have it re-written.
- Files are saved in the OFX Files folder inside the My Documents folder. NOTE: Since My Documents is a restriced folder under Windows 10, you will get a warning from Windows Defender.
OFX Versions
- Most PFM's accept and support OFX version 1.02 however, in some cases where a PFM's OFX parsing engine is strict, e.g Sage, you will need to select the SGML option (where available).
- PFM's that support OFX version 2.02 (and 2.11) generally also support version 1.02, however, not all support SGML.
- Investment OFX files are only supported by OFX version 2
QIF Settings for iCreateOFX Basic
When you save to QIF, you have a feature to set the Date format to be applied to the QIF file as well as the whether to include account headers.
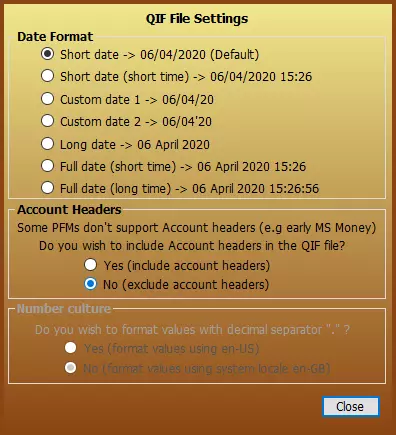
- The dialog will be presented only on the first time you save to QIF. A new item, QIF Date, will appear in the top bar such that if you wish to change these values later you can access the dialog by clicking on the button. Settings are persisted over sessions.
- Date format - the resulting date format is displayed alongside each selection. These may differ from what is shown above as the format is dependent on you system culture.
- Account Headers - Apart from Microsoft Money, most other PFM's do not support account headers and will thus fail to import the QIF file.
Microsoft have a guide on how to go about this here.
Error: File not found. Check the file name and try again.
If you encounter this message when trying to save a file to disk on Windows 10, this is due to Controlled Folder Access and can be resolved in the following steps (you can also refer to this Microsoft article.)
- Select Start > Settings > Update & Security > Windows Security > Virus & threat protection.
- Under Virus & threat protection settings, select Manage settings.
- Under Controlled folder access, select Manage Controlled folder access.
- Switch the Controlled folder access setting to On or Off.


